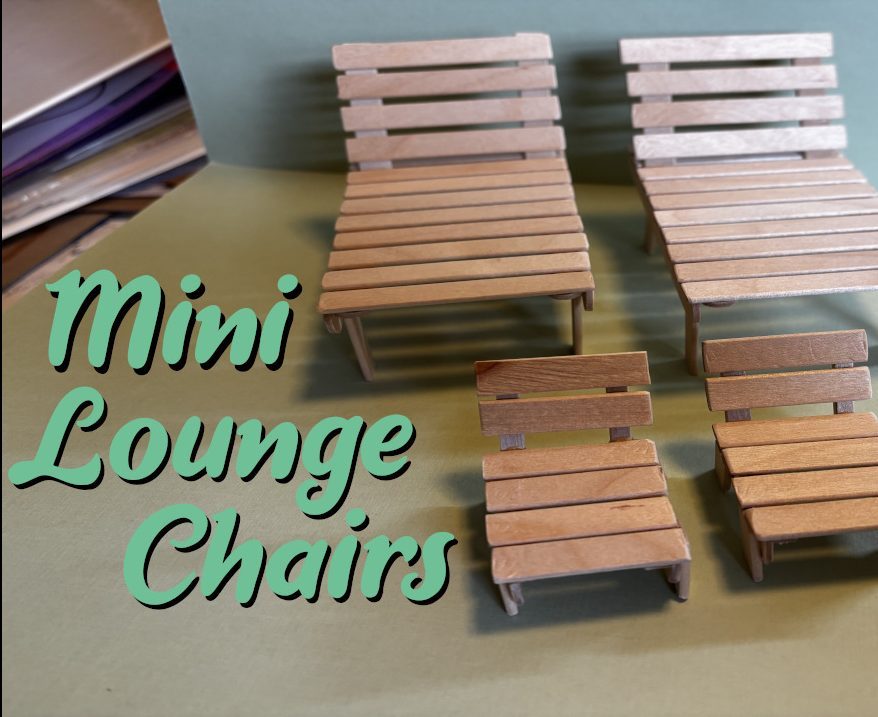
I make a pair of wooden lounge chairs in 1:12 scale using popsicle sticks, wood glue and clamps. I basically had created a chair I loved so I duplicated it and show my process of doing so. Measuring, sanding, glueing, and clamping while comparing to the first chair is how it went. I used miter shears in this one which have become a truly beloved tool for me, 180 grit sand paper and several types of clamps. The best part of the video for me is when I reveal the even smaller chairs (1:24 scale) and then proceed to create those!
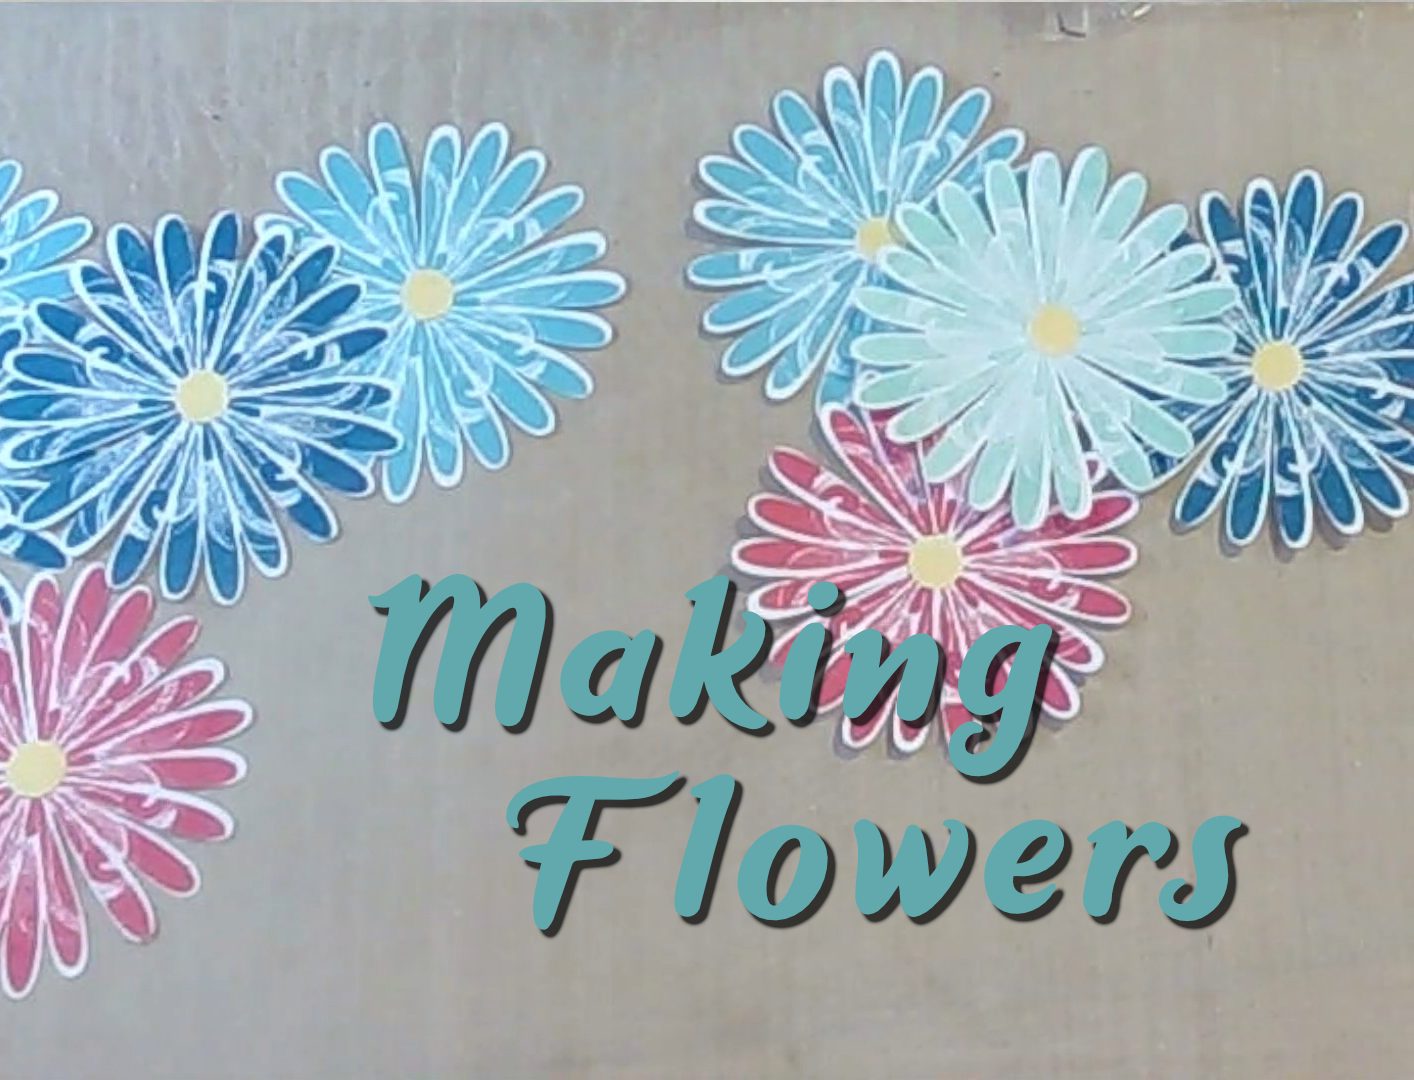
Attaching a bunch of petals together to make beautiful, big flowers! I used previously stamped and trimmed flower petals and flower centers. I cut out the stamped petal sections with scissors and the flower centers with a circle punch then used a ball stylus to create and shape the centers. I’ve used smaller styluses to emboss or deboss paper using a stencil, but these were intended for shaping gum paste edible flowers and are the perfect size for these flower centers. This technique for piecing the flowers together can be used to make all kinds of flowers where the petals are individually created. You can make several flowers in one sitting and use them for your cards, journals and scrapbook pages.
Stamp & Inks used: Close To My Heart B1338 Ink colors: Hollyhock, Tulip, Buttercup, Sea Glass, Crystal Blue, Indian Corn Blue
Posted on by rhondaComments Off on Cutting, Bending & Masking StampsTagged stamp
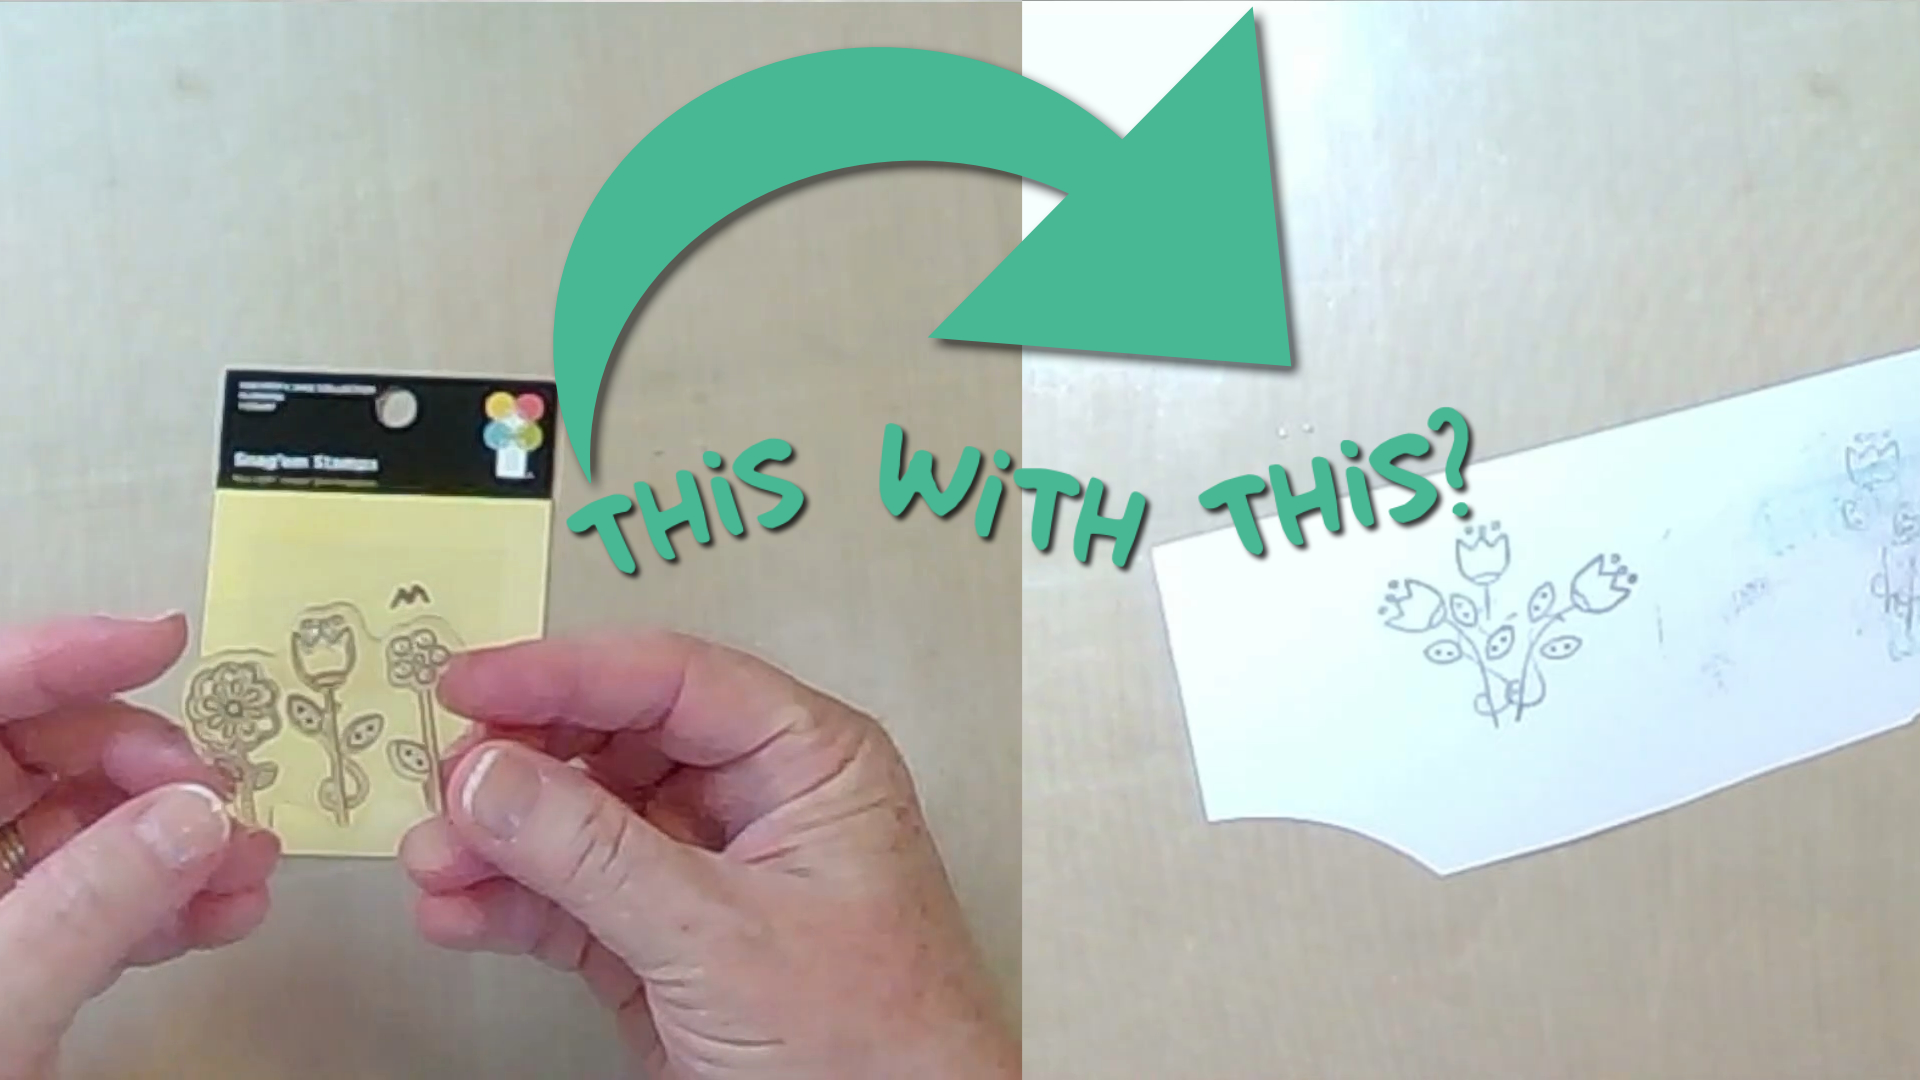
Have you ever cut up your stamps? For a good cause? Cutting them can help you achieve new images not previously possible with that stamp. This is for your clear stamps.
I also show the masking technique to stamp images close together without overlapping the actual stamped image. I use just basic supplies from my stash including a stamp, block, scissors, pen and markers. The tips and tricks shown will help you create CUSTOM embellishments for your cards, journals and scrapbook pages!
Posted on by rhondaComments Off on A Whole Set of Valentine’s Cards!Tagged card, svg
I created a whole set of cards at once and in this video I show the steps I took to do so. I created specialty shapes as .svg files available for you to download for free from my vault (look for design R007). Using a whole bunch of supplies from my stash, I cobbled a pretty good set of cards I’d be happy to hand to my love any time. These tips and techniques can be used to make a set of cards for anything you like whether they look the same as each other or all different as I’ve done.
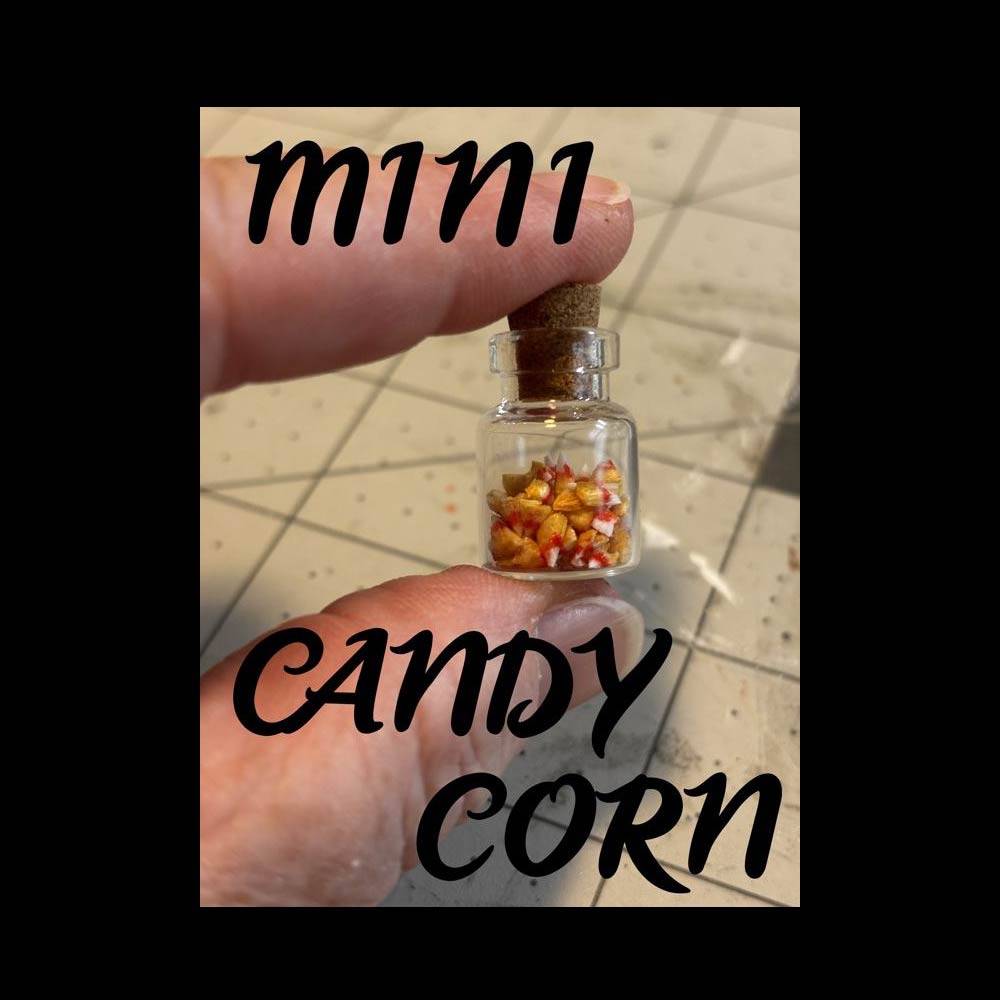
I made some adorable miniature candy corn from the foam inside foam core and some permanent markers. Easy if you’re inclined. I added it to a miniature jar with a cork lid and will one day put it in a candy store scene, but for now it’s holding its own as a wonderful Halloween decoration.
More on the outside of the house, I create twig window trim and elements of the yard on the exterior of my Woodland Elf House (1:24 scale) built from recycled household materials and glue.
Installing twig trim; creating a log in the yard, mushrooms, critters, and mossy touches on and around the house.
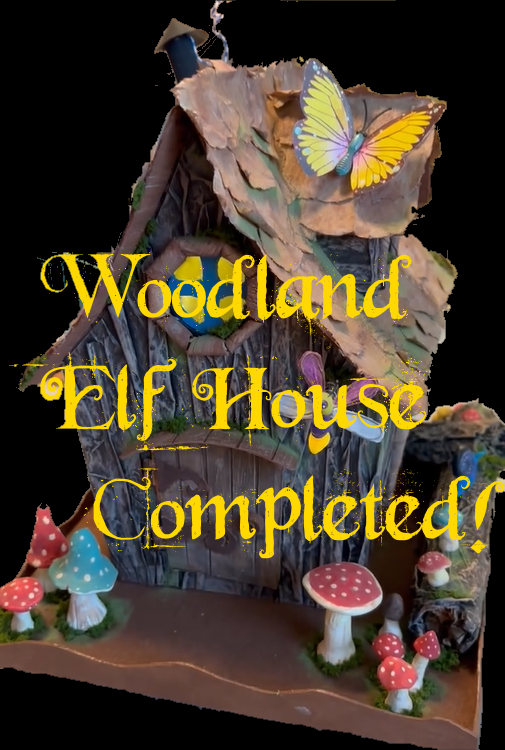
By the time this build was nearly completed, I was so, very ready for it to be done…or rather I felt done with working on it. I will clear my mind of the little house for now and work on something else to move on past this. I love this little woodland elf house, so I don’t want to linger in the feelings of ready to be done with it. I will cherish it. When I’m done displaying it on my coffee table, I’ll move it to the display case in my studio. Of course, the elf is still to come but that will wait for a couple weeks at least. Maybe the elf is foraging or visiting friends elsewhere in the woods. Yeah, that’s what I believe is happening!
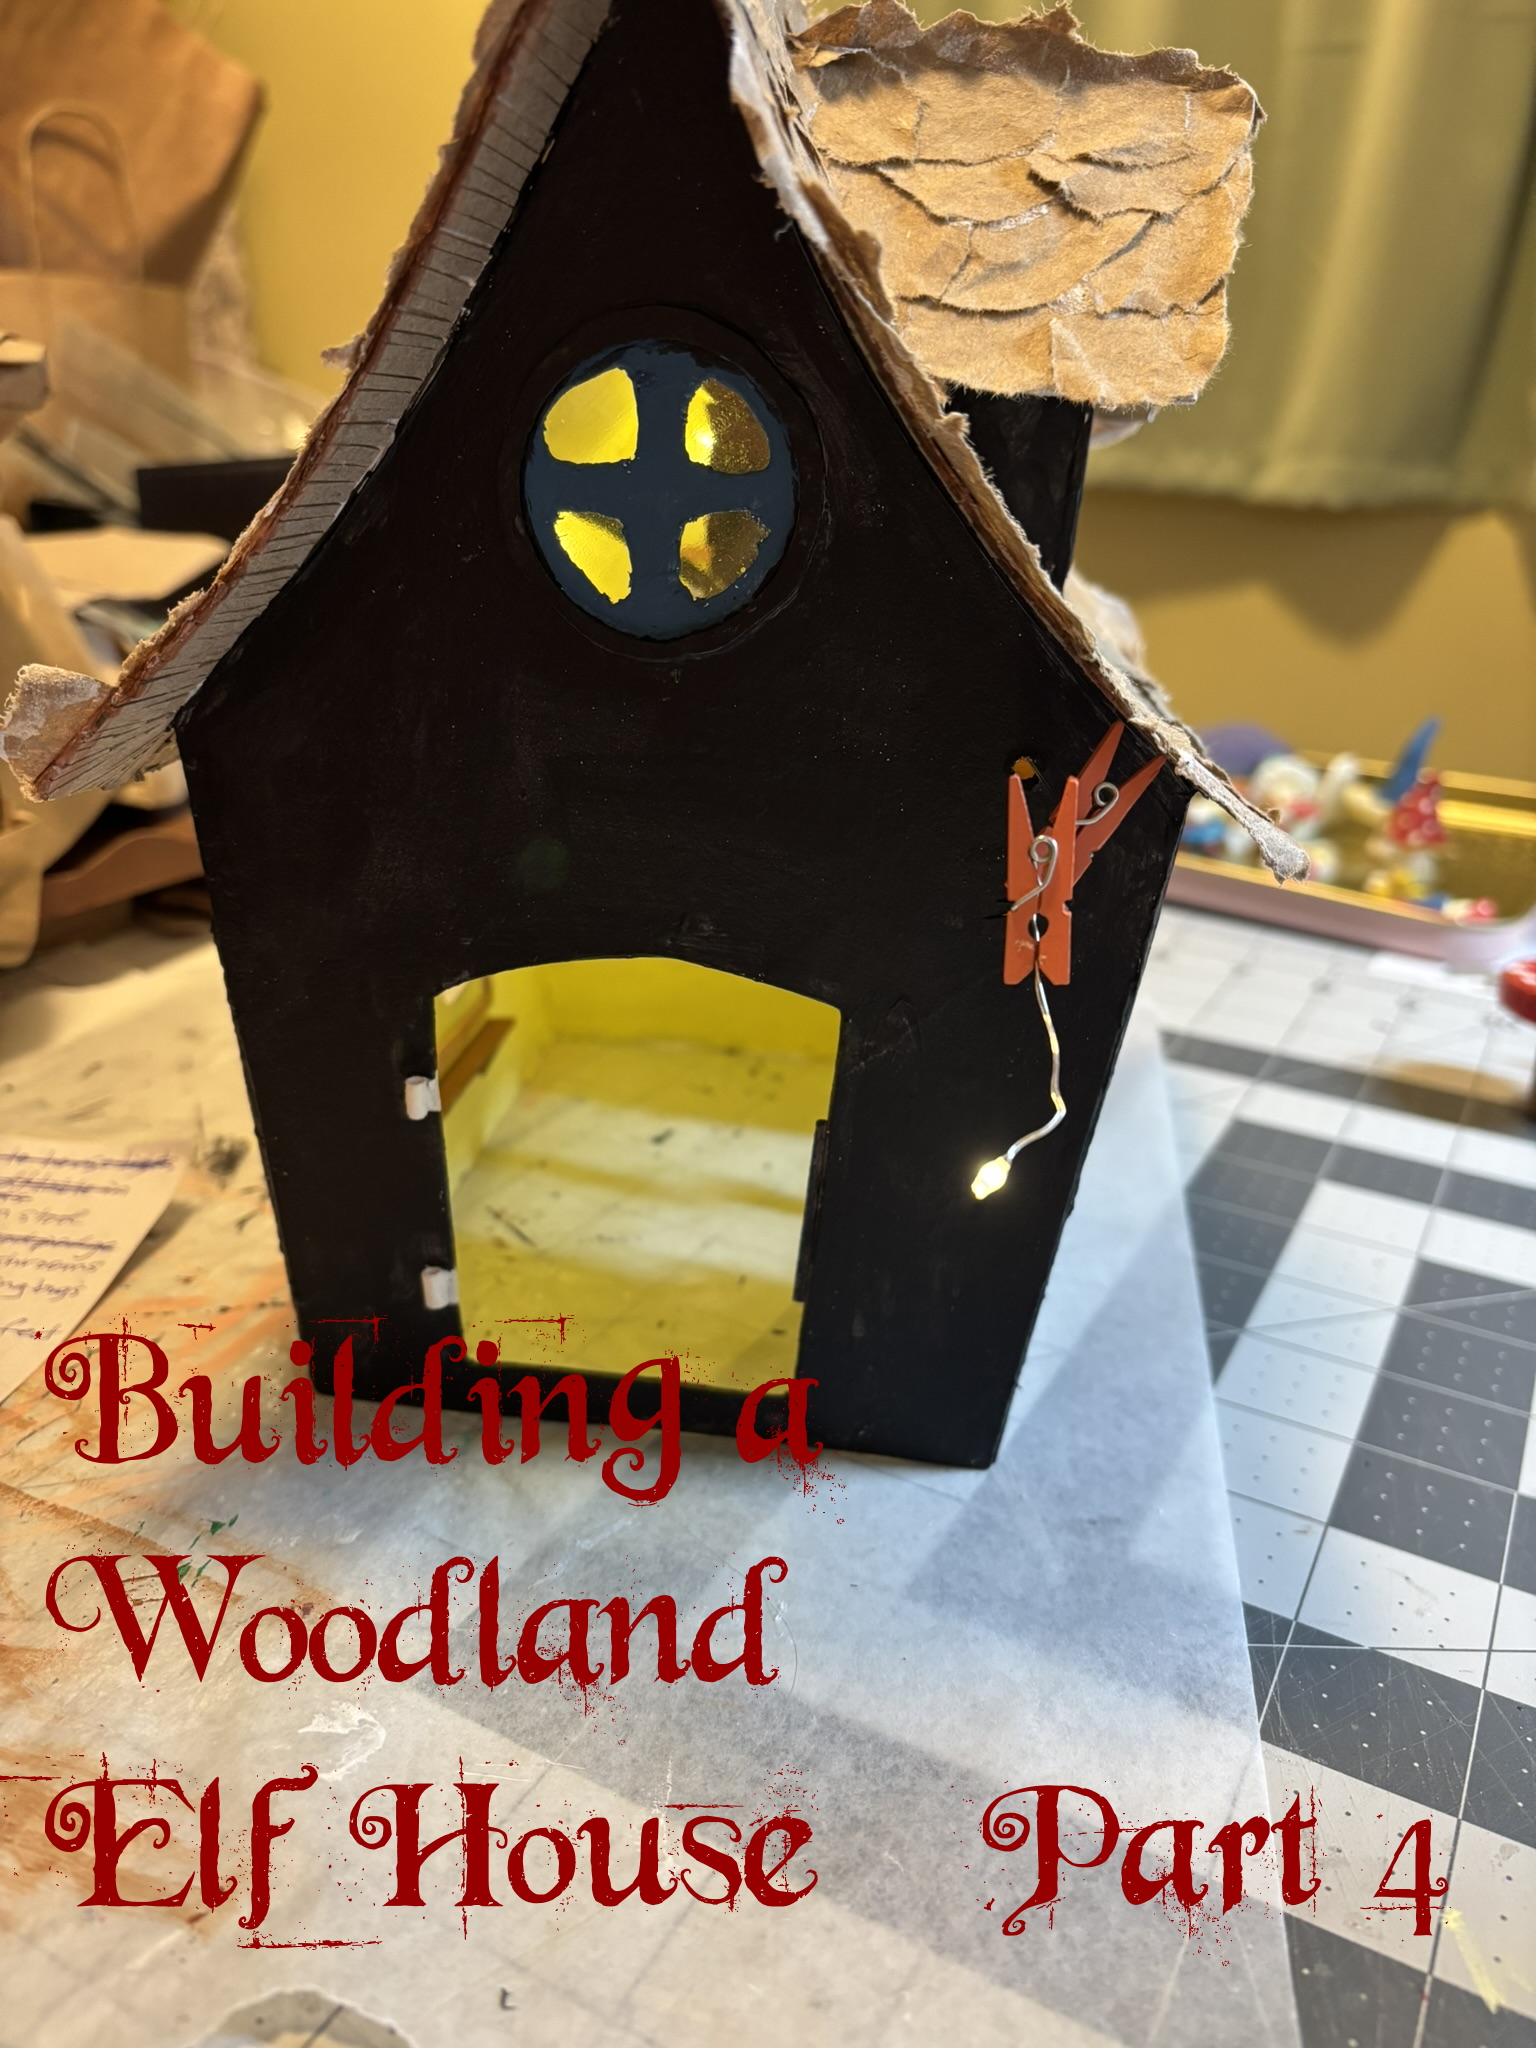
I compiled video clips and added some voiceover here and there for the latest installations on the house. I completed more of the inside the house, created more furniture and moved on to the features on the exterior of this Woodland Elf House (1:24 scale) which is built from recycled household materials and glue.
Installing lights; creating toadstool table and “woodcut” stools, boot bench, water table (with cups, ladle and bucket); finishing the base; making bark siding and painting finishing touches on the eaves and rooftop.
This one went a little long and I found myself needing to cut it off just before 45 minutes. I sincerely hope people actually find interest and watch it all the way through to the end. I’m trying to get part five finished very quickly on the heels of this one.
I’ve found that I’m beyond ready to move on to a new project so I’m trying to derive a lot of fun from the editing process and instill the reverence I felt while creating the house, its elements and any things or creatures that live around it. Trusting the process…
Excitedly adding roofing and moving inside to work on the house further by doing things like adding windowpanes and painting the inside surfaces.
After installing the loft space I needed a ladder to access it and of course wanted to add the bed and little nightstand up there but they needed painting and bedding first.
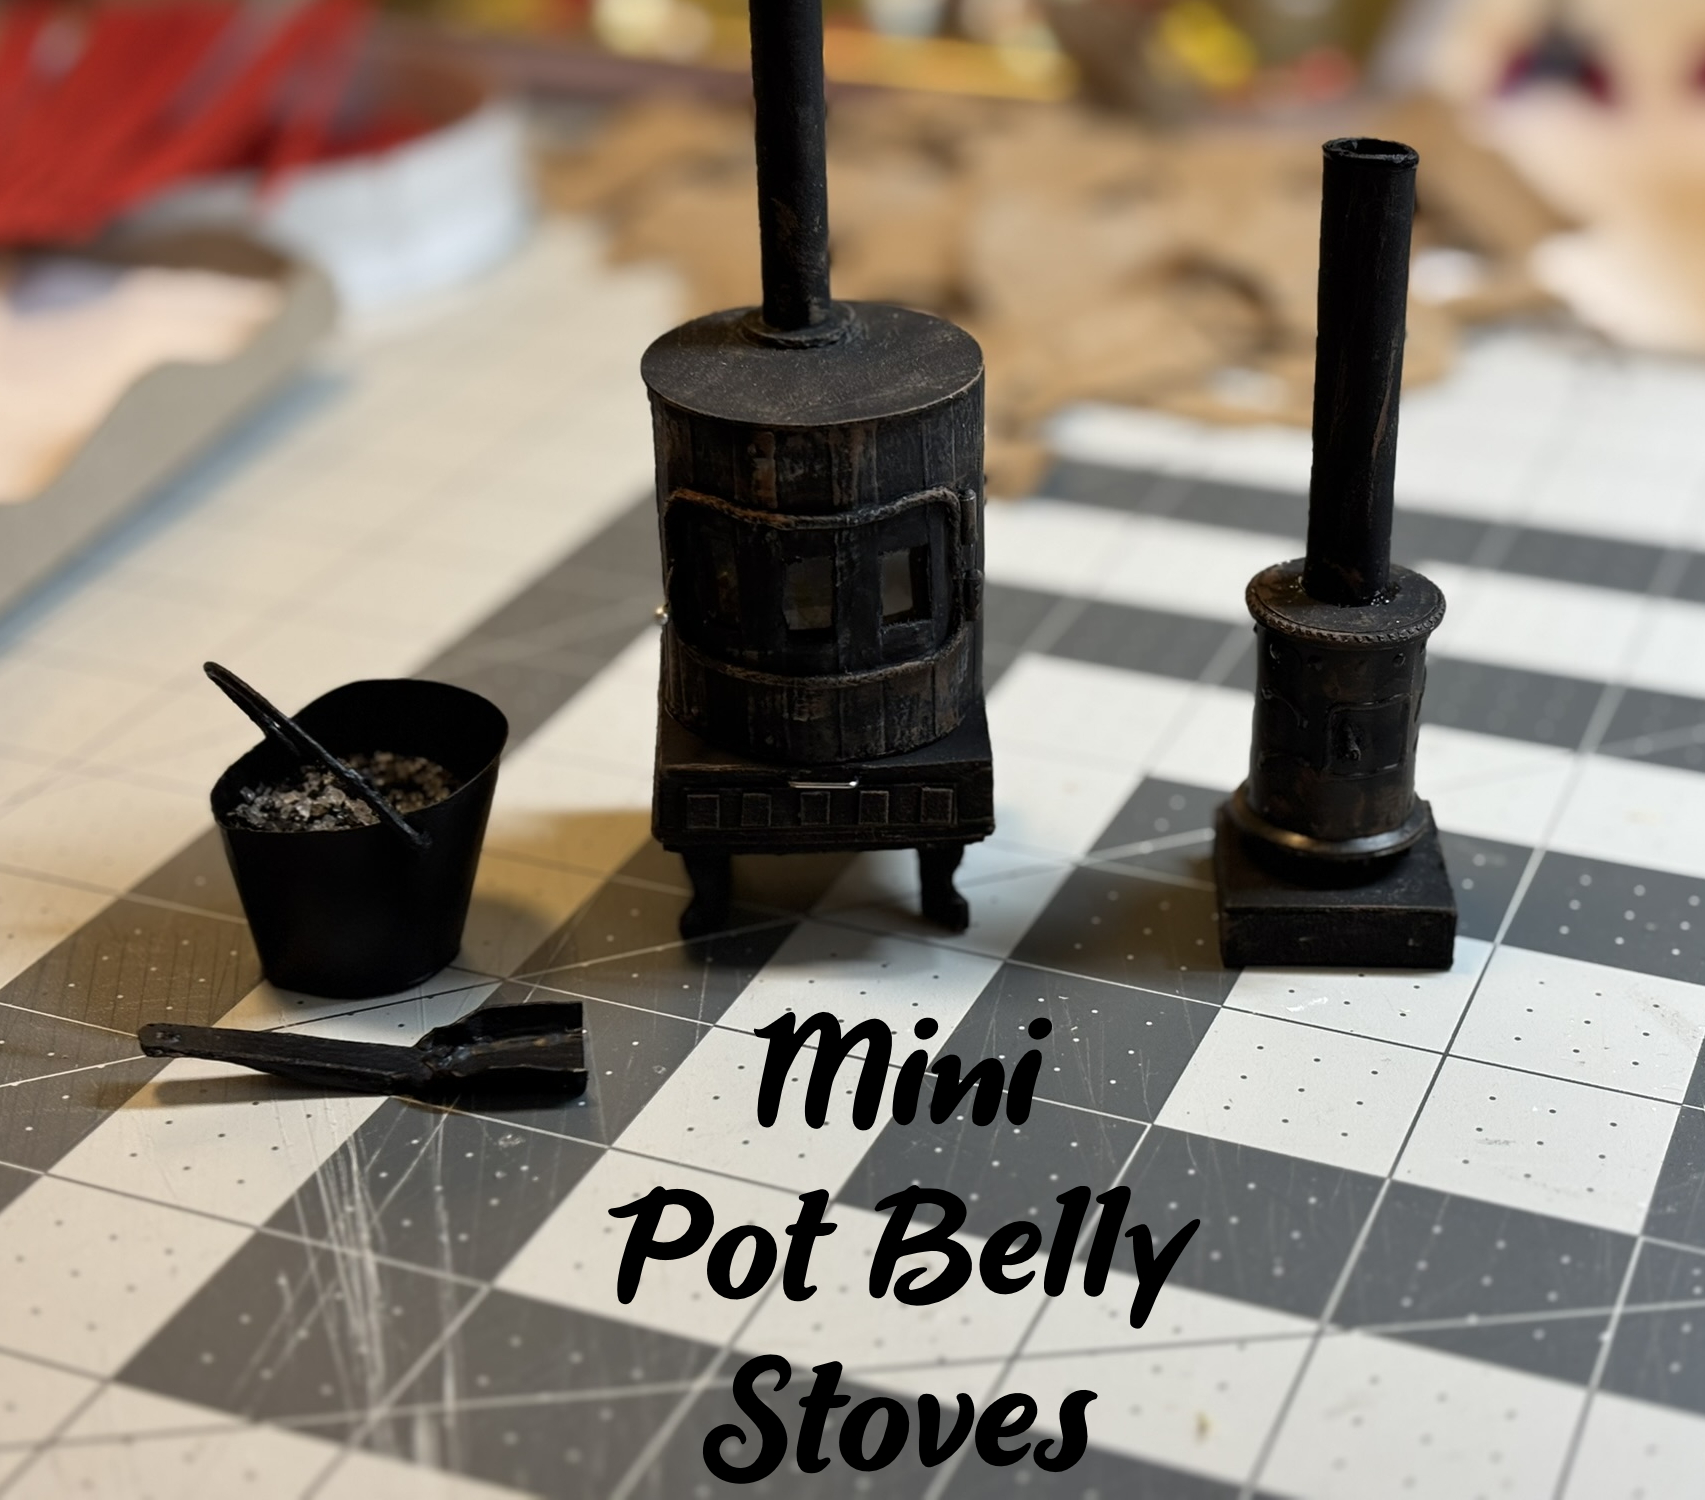
The pot belly stove needed a stove pipe and chimney. Then there was the pebble flooring and nifty shelves added beneath the windows. I also added simple hinges so the front door could be installed.
Everything is just a little wonky but it’s adorable and coming right along.
If you’d like to watch the step-by-step video then here it is. Remember to like the video and leave a comment.
In the process of work on the Woodland Elf House, I built TWO pot belly stoves alongside each other! The main one is done in 1:12 scale and will be installed into the kitchen of my cardboard cottage while the small one is 1:24 scale and will be installed into the Woodland Elf House, which is nearly finished. These stoves are built from recycled household materials and glue. The large one is made of paper, cardboard, packaging plastic and a sewing pin. The small one is made primarily of a thread spool, paper, cardboard and the tip of a toothpick. They were painted with craft paint and then dry-brushed with more craft paint to bring out the details.
Once construction began on the main stove, I realized I wanted to make a small shovel to remove ash from the stove. I instantly imagined a shovel I remember being used in the fireplace growing up. It was stamped from one piece of metal and then crimped and bent into shape. I basically recreated that shovel (using recycled cereal box chip board) which was a wonder to me as a child.
Later, having the stoves and the shovel led me to realize I would be making a small bucket where the manager of the pot belly stove would put the ashes. Using simple scrapbook card stock and a length of thread I was able to make a handy bucket. As a point of interest, I place the contents from a couple of “do not eat” silica packets which include both black and clear pieces and look mysteriously like ash in the bucket, but this detail was not included in the video as I did it much later.
If you’re merely interested or if you endeavor to build pot belly stoves for your dollhouse, then please take a look at my video posted on my YouTube channel. Drop me a like and make a comment if you’re so inclined.
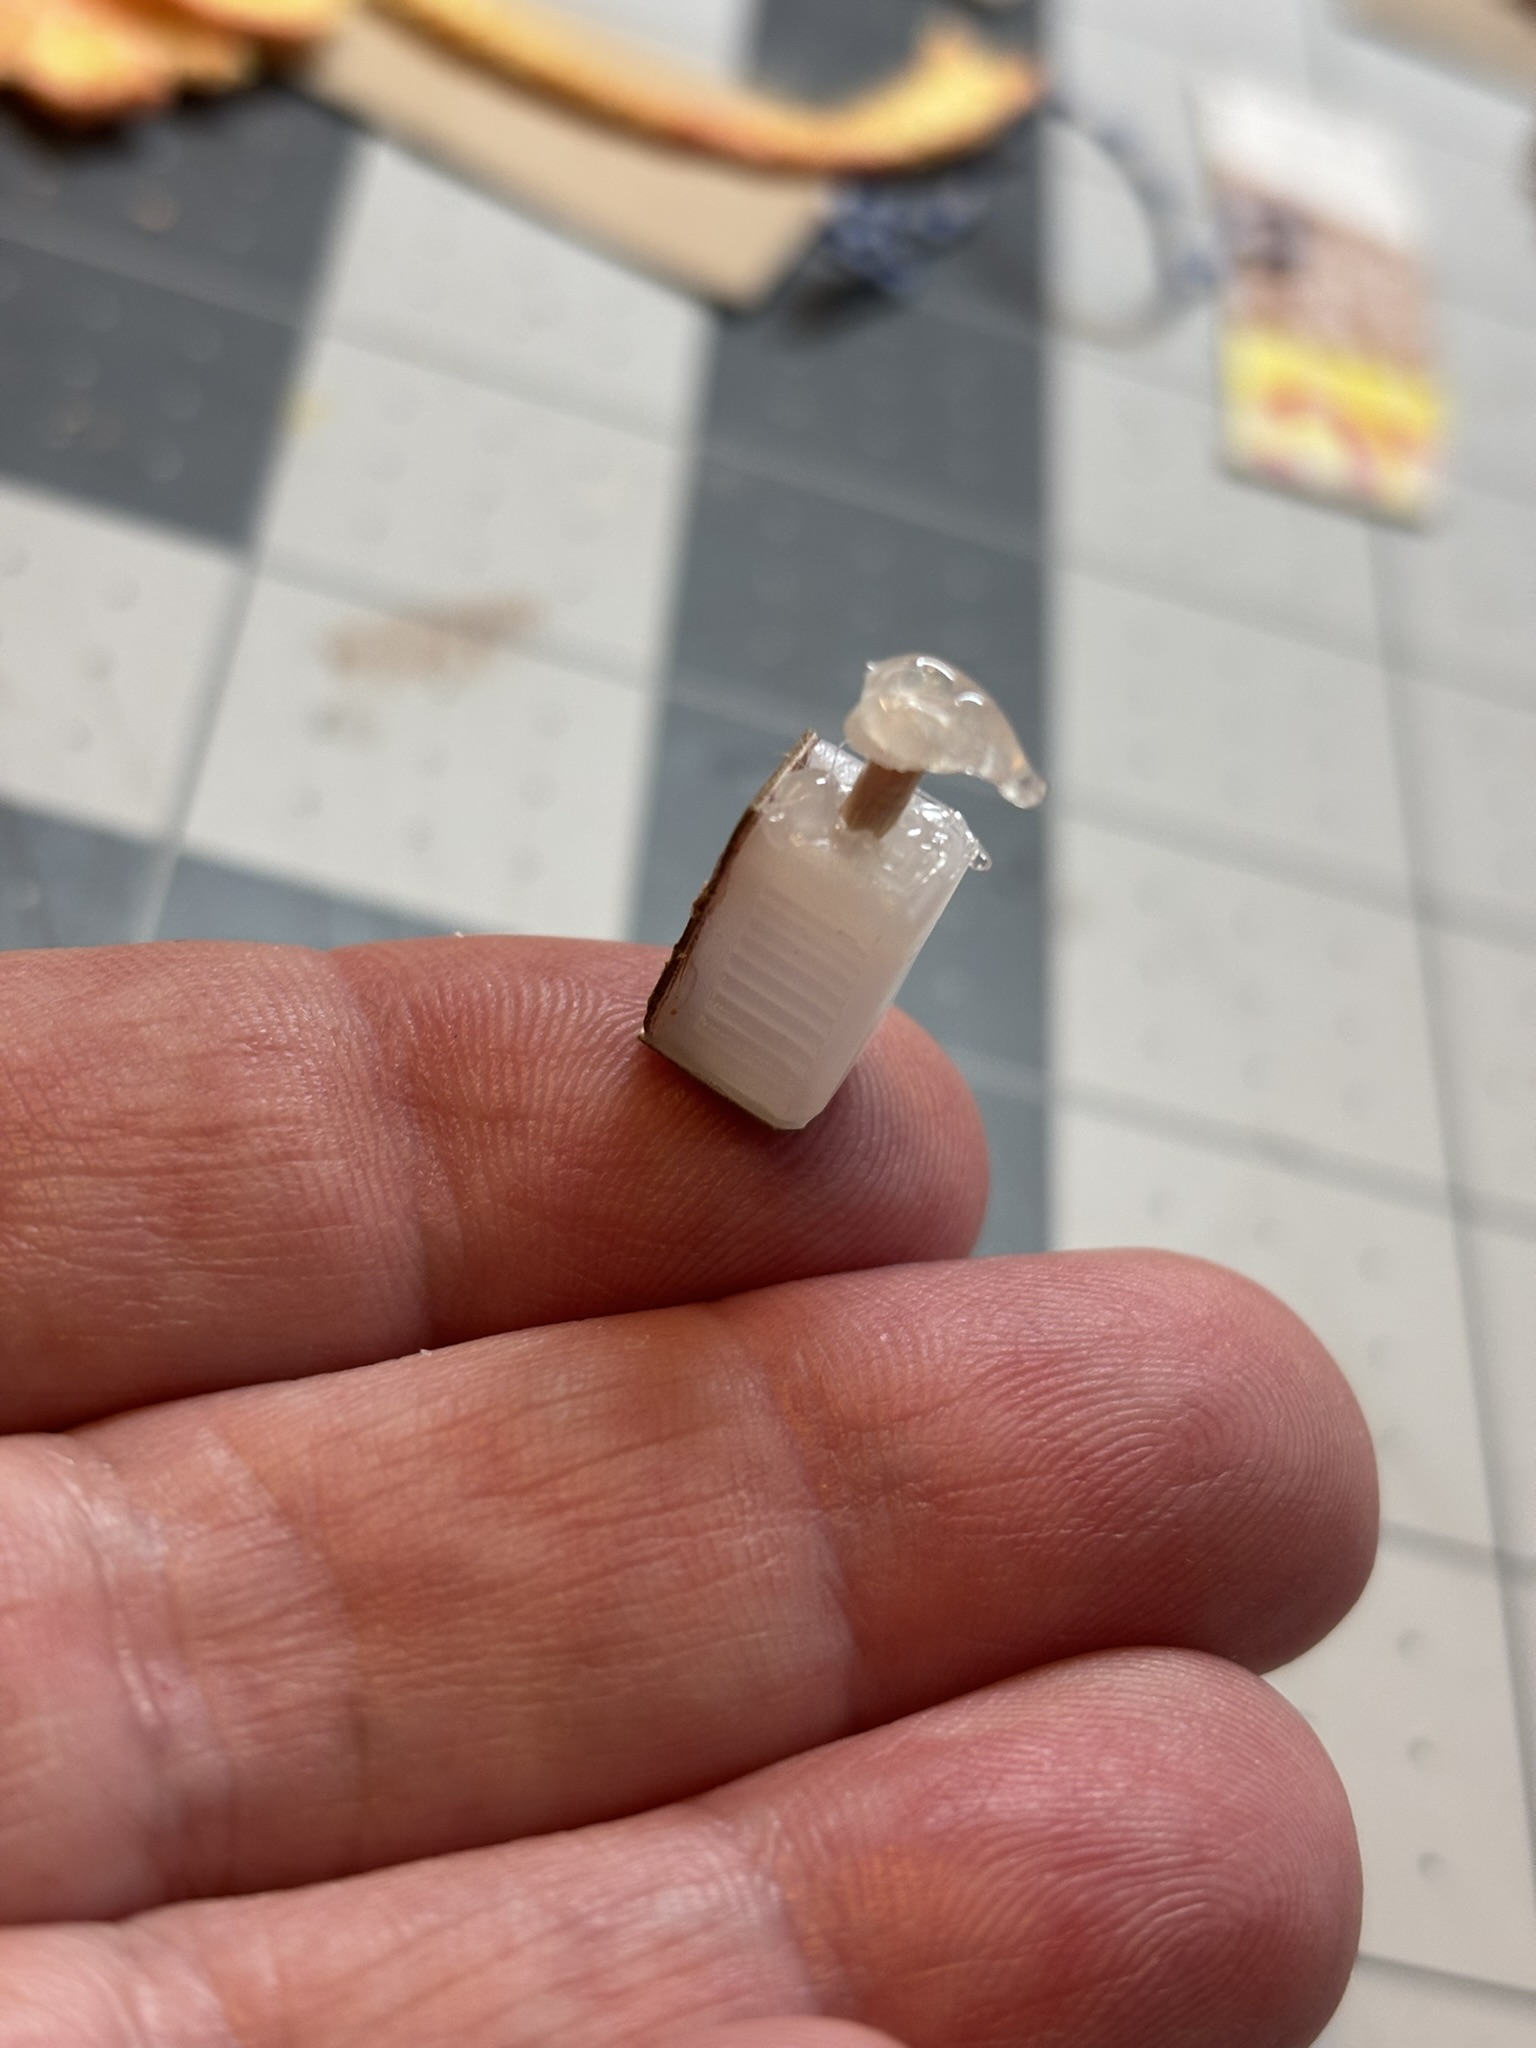
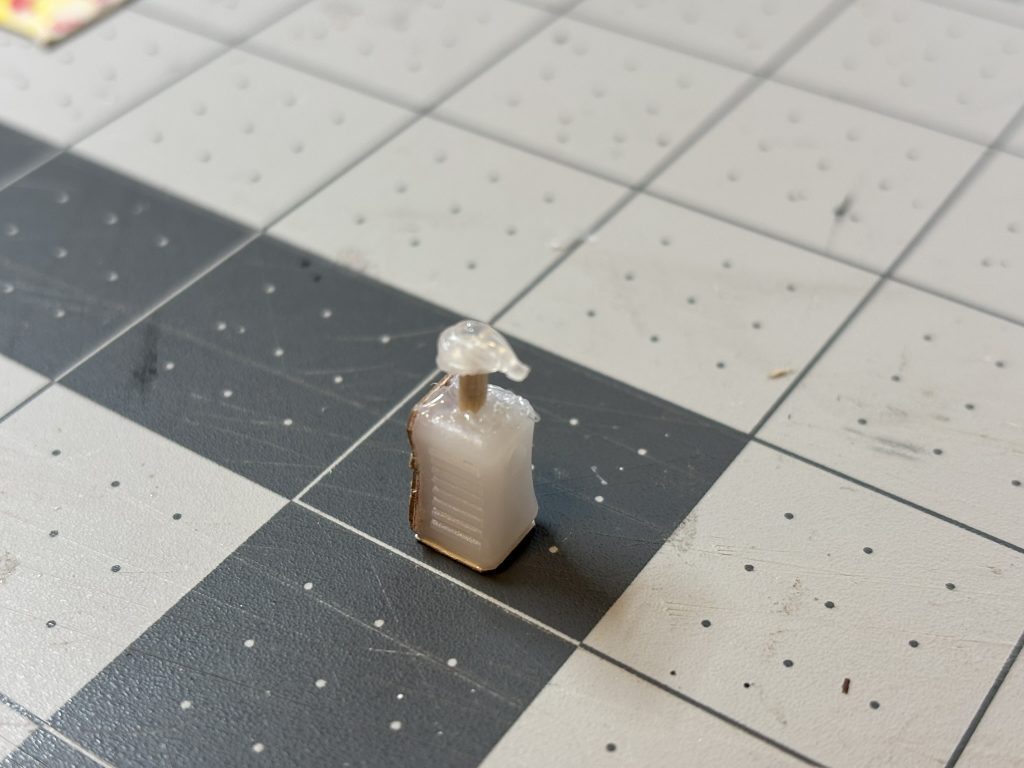
This was a quickly satisfying miniature to create! Here are the steps I took:
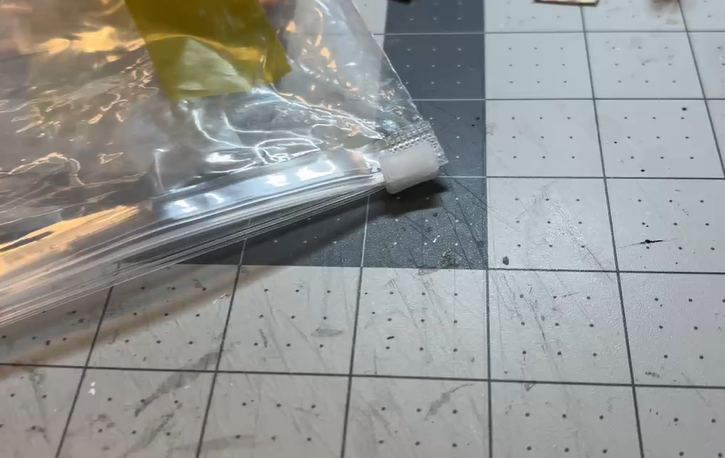
Took a plastic zipper head off a plastic bag (that housed something I’d ordered from Amazon)
Sanded the back and bottom a bit to allow the plastic to accept glue
Added craft glue to the back and set on cereal box chip board and set aside to dry
Trimmed away excess chip board material with scissors
Added craft glue to the bottom and set on cereal box chip board and set aside to dry
Trimmed away excess chip board material with scissors
Cut a 1/2″ length of toothpick
Used precision tip hot glue gun to make a small bead of hot glue onto a metal surface, drawing the tip away to cause a teardrop shape with a flat bottom.
Filled the zipper head with hot glue (held head with tweezers to avoid burn)
Placed toothpick length into top of zipper head
Scraped teardrop shape from metal surface and used small dab of hot glue to adhere to top of toothpick